
Appearance
Before After Slider
The Before After Slider Section is a visual way to showcase transformations, product effectiveness, or customer results. Visitors can drag a slider to see the difference between the “Before” and “After” state. 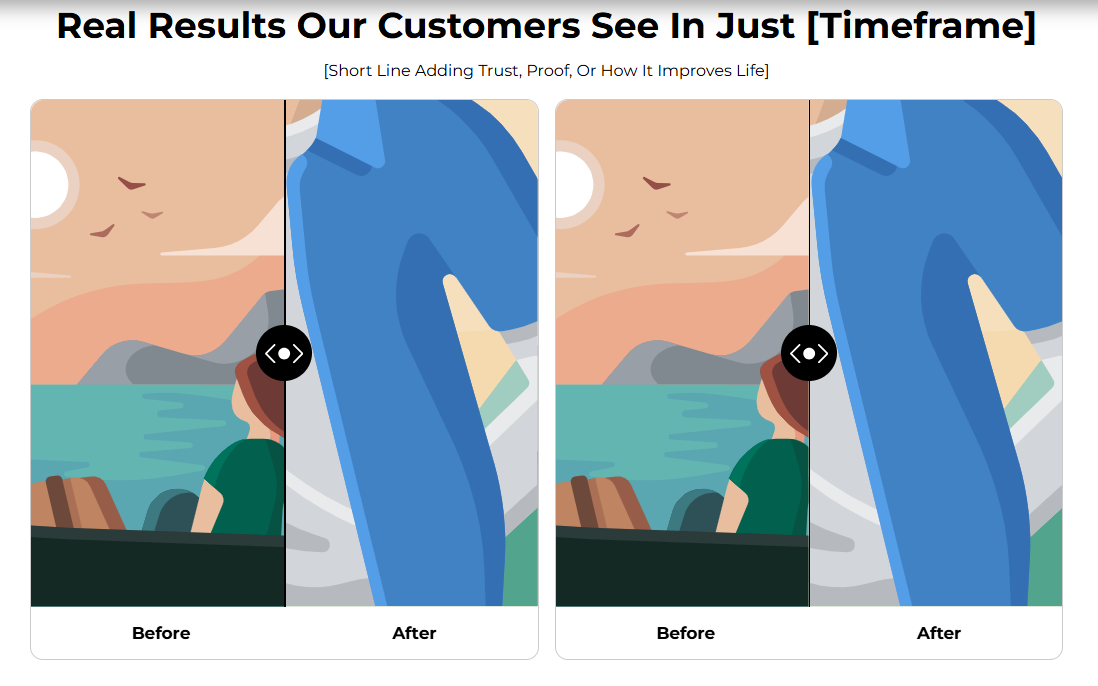
Adding The Section To Your Store
- Open your theme editor.
- Click on “Add Section”
- Find and add the “Before After Slider” Section from the block library
Styling The Section
The Before After Slider section is a powerful visual tool to highlight transformations, product effectiveness, or customer results. It lets visitors drag a slider to compare two images, typically showing progress or improvement after using your product.
This section is especially effective for beauty, fitness, or lifestyle brands, as it delivers instant visual proof that builds credibility and trust. Use clear, high-quality images and short captions to make the comparison stand out.
Step 1 – General Settings
Below is a list of all the general settings found on all sections built inside Momentum Theme
Background Color Set the backdrop of the gallery. Transparent blends with the page background. Use a subtle solid color if you want images to stand out more.
Heading Size (Small / Medium / Large)
Control the size of your headline choose Small, Medium, or Large depending on how prominent you want your section title to appear. Headline Typography (AA / Aa / aa)
AA = ALL CAPS (bold and strong). Aa = Title Case (professional). aa = lowercase (minimal, casual). Font Family Default: Use your global theme fonts to style the section. Custom: Allows you to select an alternative font to style this section
Example: Montserrat is a clean and legible font for modern looking stores.
Title Color Titles: Sets the colour of the blocks main headline
Subtitles & Body Text: Sets the colour of the subtitle and card copy
Verified Text: sets the colour of the “Verified Customer” tagline.
Heading Alignment Choose alignment: Sets the position of the headline and supporting copy Left, Center & Right Aligned. The center option is most common for galleries. Section Width Full Width: Block spans the entire width of the screen. Contained: Adds side margins for a neat look.
Padding (Desktop & Mobile) Controls spacing around the gallery elements both horizontal and vertical
Example: Desktop Horizontal = 70px (wide margins).
Mobile Horizontal = 15px (compact for small screens).
Display OnChoose where to show the section. Default: All Devices. Image Round Corner
Gives rounded edges to images for a softer look. Marker Color
Defines the slider line color (default black). Marker Plus Color Defines the “+” icon color on the slider handle (default white).
Step 2 – Content Settings
This settings allows you to customize the content of your headline and subtitle.
Title The main headline describing your value proposition. Example: “Real Results Our Customers See In Just [Timeframe]”. Subtitle Builds trust + proof + improvement.Example: “Trusted by thousands, visible changes in just days”.
UppertitleOptional small label above title, e.g., “Proven by Results”.
Step 3 – Block Settings
Block Name: Slide
This setting allows you to add before/after images along with their labels. Each Slide contains one transformation story. You can add multiple slides. Before Image
Upload a clear “before” photo.Use high-resolution, authentic images.
After Image
Upload a clear “after” photo.Ensure lighting/background is similar for credibility.
Before Label
**Default: “Before”.**Can be changed to “Day 1” or “Without Product”.
After Label
**Example: “After 2 Weeks”.**Customize based on the actual timeframe.
Best Practices
Always use real, authentic photos (avoid stock images). Keep before and after conditions consistent (same lighting, angle). Add multiple slides to showcase different customer cases. Use specific labels (“After 30 Days”) instead of vague ones. Keep the background clean so the slider stands out.
FAQs
Q. Can I add multiple Before/After sliders? A: Yes, simply add more Slide blocks. Q. Do images need to be the same size? A: Yes, to prevent stretching or misalignment. Crop them consistently. Q. Can I change the slider color? A: Yes, Marker Color and Marker Plus Color allow full customization.
Troubleshooting
Images not aligning properly? Make sure both images are the same resolution and aspect ratio. Slider not visible on mobile? Check if Display On is set to All Devices. Labels not showing? Ensure both Before Label and After Label fields are filled. Testing Checklist
Title includes timeframe (e.g., “After 30 Days”).
Subtitles build trust and proof.
Before/After images are authentic and high quality.
Labels are clear and specific.
Slider works smoothly on both desktop and mobile.
Marker and corner styling matches brand aesthetics.