
Appearance
Rich Text Section
Overview
The Rich Text section is a foundational building block for your store, allowing you to convey your brand's message, mission, or important announcements using clean and readable typography. It is designed to be simple yet highly customizable to fit any part of your page.
This section is perfect for when you need to speak directly to your customers without the distraction of heavy imagery. Use it to:
Introduce your brand: Share your "About Us" or mission statement.
Highlight key features: Describe product benefits in detail.
Make announcements: Share news, promotional details, or shipping updates.
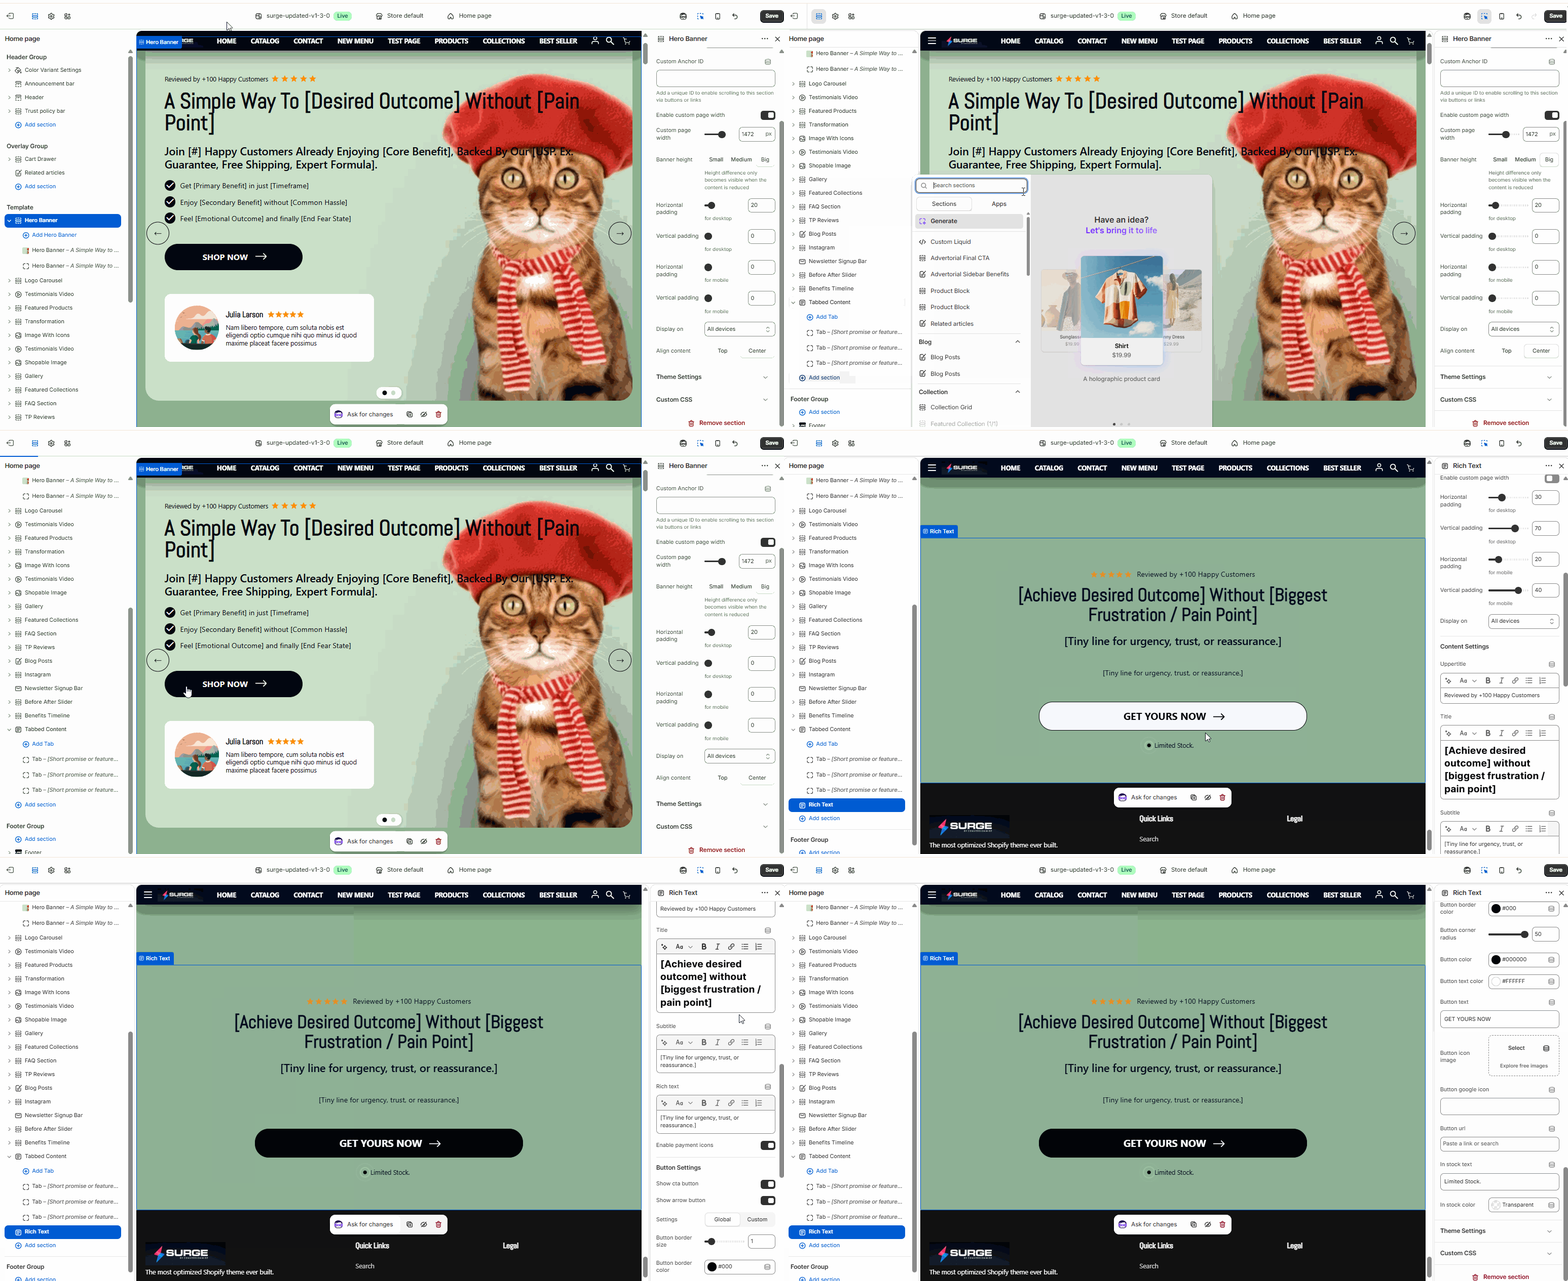
Step-by-Step Setup Guide
Follow these steps to configure the Rich Text section in your Momentum theme:
1. Add the Section
Navigate to your Shopify Theme Editor.
In the side menu, scroll to the **Template area and click **Add Section.
Search for and select Rich Text.
2. Configure Section Settings
Click on the Rich Text section header to access the layout controls:
Enable Custom Page Width: Toggle this on if you want to set a specific width (in pixels) for the text container, preventing it from stretching across the full screen.
Desktop & Mobile Padding: Use the sliders to adjust the horizontal and vertical spacing. This ensures your text has plenty of "breathing room" on all devices.
Display On: Choose whether this section appears on Desktop, Mobile, or All Devices.
Content Alignment: Set your text alignment to Left, Center, or Right to match your design aesthetic.
3. Customize Content Blocks
The Rich Text section is made up of individual blocks (Heading, Text, and Button) that you can customize:
Heading: Enter your primary title and select the heading size (Small, Medium, or Large).
Caption/Subheading: Add a smaller line of text above or below the main heading for extra context.
Text: Use the rich text editor to write your main body content. You can bold, italicize, or add links here.
Button: Add a Call to Action (CTA). Enter the **Button Label (e.g., "Learn More") and paste the **Button Link to direct customers to a specific page.
4. Save Your Changes
Drag and drop the blocks within the section to change the order (e.g., placing the button above the text).
Click Save in the top right corner to push your changes live.
Need Further Assistance?
If you need help, contact our support team and we'll be happy to assist.